When I first decided to build an epoxy table, I did what most people do — hit the internet and started a list of tools. That list quickly turned into a shopping cart spiral. Half the stuff I bought? Didn’t even touch it. The other half? Game-changers. So this post is for anyone trying to figure out what you really need in your resin table tool list — and what you can skip (for now).
Why I’m Sharing This List (Spoiler: I Bought Stuff I Didn’t Need)
What I thought I needed vs. what actually made a difference
I thought I needed every woodworking gadget on YouTube. Turns out, a few key tools got me 90% of the way. The rest? Helpful down the line, but not essential for getting started.
You can start simple — here’s what I’d recommend
If you’re building your first epoxy table and trying to keep it lean, this breakdown’s for you. Consider it my honest take on what belongs in a beginner’s epoxy resin kit. You can also check out my very first build if you're curious how I got started with zero experience.
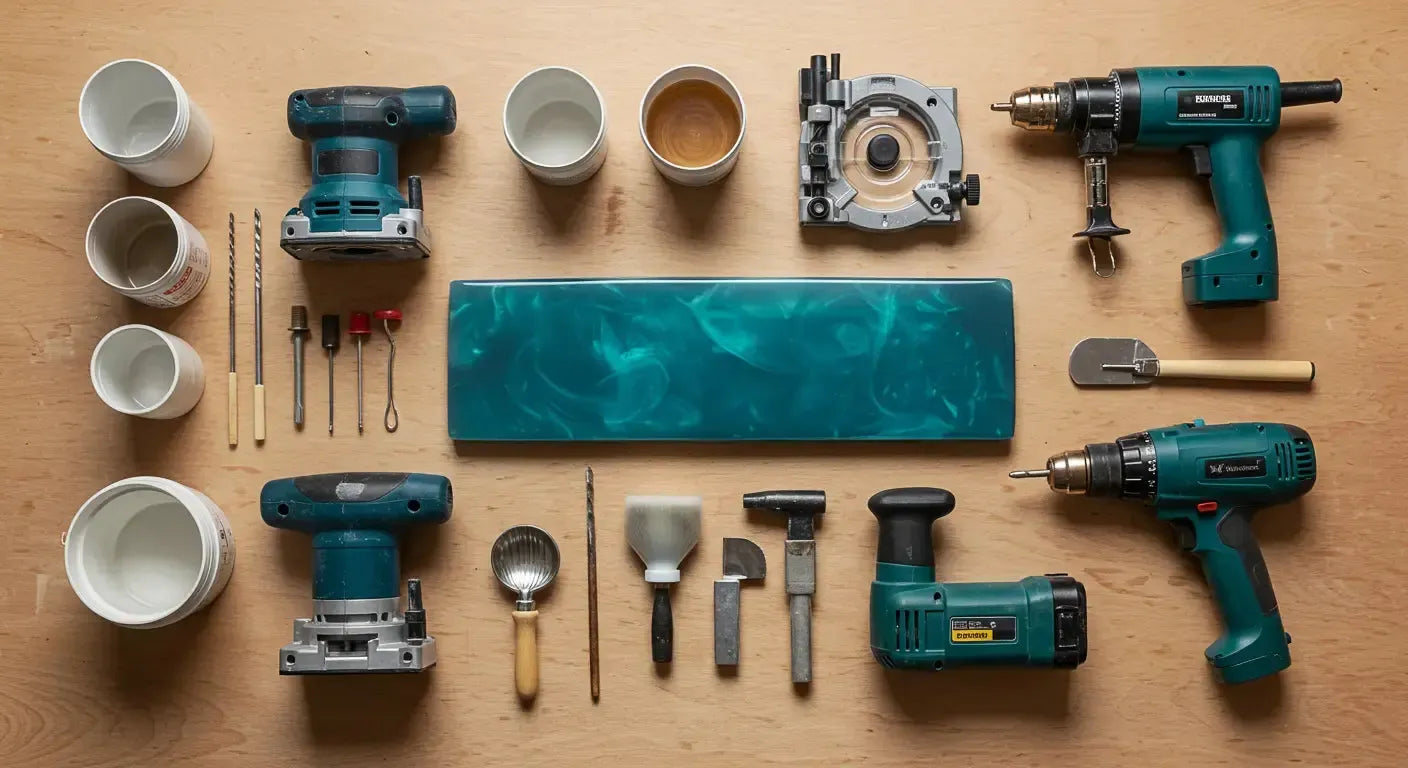
The Core Tools I Couldn’t Build Without
Power sander (and what grit range worked for me)
You’ll need this. I started with a random orbital sander and worked through 80 → 120 → 220 → 320 → 400 grits. Wet sanding kicks in later if you want a glassy finish. Just be sure to monitor heat while you're dry sanding and don't sand too long. If it gets too hot you're in trouble. For more detail on polishing, I break down the full process in this blog.
Circular saw or track saw (for prepping wood slabs)
Unless your slabs come pre-cut, this is how you get clean edges and size things properly. I used a track saw for straight, accurate cuts without a full table saw setup. I go into more about the prep process in how I build epoxy tables from start to finish.
Router and sled for flattening the table
A router sled changed my game. I flattened everything by hand before that — it worked, but took forever. Now I rough-flatten with the sled, then sand smooth. Some people use CNCs, but I still prefer the sled.
Heat gun or torch for bubble removal
A butane torch gives you more control, but a heat gun is safer indoors. You’ll need one or the other to pop surface bubbles during your pour. I talk more about bubbles and when I actually leave them in this post.

Mold-Making and Setup Tools
Resin-Specific Tools That Made Life Easier
Mixing containers and stir sticks (size matters)
I keep a stack of 1-quart and 5-quart buckets on hand. For big pours, larger containers help reduce the risk of overmixing or overheating. More on resin types and mixes in this breakdown.
Accurate measuring tools for 2:1 or 1:1 resin
You have to be precise here. I switched to a digital scale for accuracy — it’s better than eyeballing with marked buckets.
Drill and paddle mixer for large pours
Once you scale up, stirring by hand won’t cut it. A paddle mixer on a low-speed drill gets the job done without whipping air in.
Nitrile gloves and a good respirator
Uncured resin isn’t something you want on your skin or in your lungs. Gloves, a respirator, and good ventilation are all part of the real epoxy table tools list. For more safety and usage info, check out this blog on toxicity and safety.

Finishing Tools for That Pro Look
Sanding setup: grit progression and foam pads
Start coarse and move up — no skipping grits. Foam interface pads help contour around edges without gouging.
Polishing compound and buffer (mirror shine!)
After sanding, I use a polishing compound and a soft buffing pad to hit that deep-gloss look. If you're chasing that mirror shine, I broke down what actually worked in this detailed blog.
Edge finishing: chamfer bit vs. hand sand
A chamfer router bit gives you crisp edges fast. But on more organic builds, hand sanding lets you round or soften things more naturally.
What I used to attach legs and hardware
Basic drill/driver, screws, and a square to line everything up. I use T-nuts for removable leg hardware and extra security. If you're unsure about leg style, I went deep on that in this post.
Optional Tools I Tried (And Whether I’d Use Them Again)
Tools I Wish I Had from the Start

FAQ: Tool Questions I Had Before Getting Started
Can I build an epoxy table without power tools?
Technically yes — but expect a workout. Power tools speed up flattening, cutting, and sanding a lot.
What’s the bare minimum tool list to get started?
Sander, saw, mold materials, mixing gear, torch or heat gun, and patience. That’s it.
Do I need woodworking experience first?
Not at all. I learned everything from online tutorials, forums, and screwing things up. You’ll be fine. Or just start with my beginner build post.
Final Thoughts on Tooling Up for Your First Table
Start with what you have, level up as you go
You don’t need a full workshop to start making epoxy furniture. I started with a sander, a cheap saw, and a pile of ambition.
What I’d tell any beginner walking into a hardware store
Focus on epoxy table tools that’ll help with safety, precision, and finishing. You can always add the rest later. For more help navigating early mistakes, I shared my own in this blog.
Building with confidence > buying everything at once
I’d rather see you build something with basic gear and learn than let a tool list stop you from trying. The best part of epoxy work is figuring it out as you go.
Thanks for taking the time to read—I really appreciate it. I hope something in my process (or my mistakes) helps you along the way. If you want a custom piece or hit a wall building your own, feel free to drop a comment or reach out—happy to help. Have a blessed day!


Share:
1 comment
Thank you so much for sharing your experience & valuable information! You are very much appreciated! I’m going to attempt a small project first with prayer & patience👍🏼😊