If you’ve ever tried finding a ready-made mold for an epoxy table, you know the struggle. The size is off. The price is wild. The shape isn’t right. That’s exactly why I decided to make my own. This isn’t a textbook tutorial—it’s what actually worked when I needed to build a mold for an epoxy table from scratch. No fancy workshop, just real tools, real mistakes, and a finished mold that didn’t leak. If you're new to epoxy builds, check out some of the other things I learned while getting started.
Why I Needed to Make My Own Mold in the First Place
Pre-made molds were too small, too expensive, or just not right
I wanted to pour a 40" custom river table, and nothing I found online even came close. Most DIY resin tabletop mold options were built for charcuterie boards—not full-sized furniture.
I wanted full control over the size, shape, and pour style
Resin doesn’t wait for anyone. I needed a mold that gave me room to work, level sides, and zero stress about leaks mid-pour.

What You’ll Actually Need to Build a Mold That Works
Tools I Used (and a couple I wish I had from the start)
- Circular saw (a table saw would’ve been easier)
- Power drill
- Caulk gun
- Clamps
- Level
- Painter’s tape or sheathing tape
Materials That Held Up — Melamine, screws, tape, and sealants
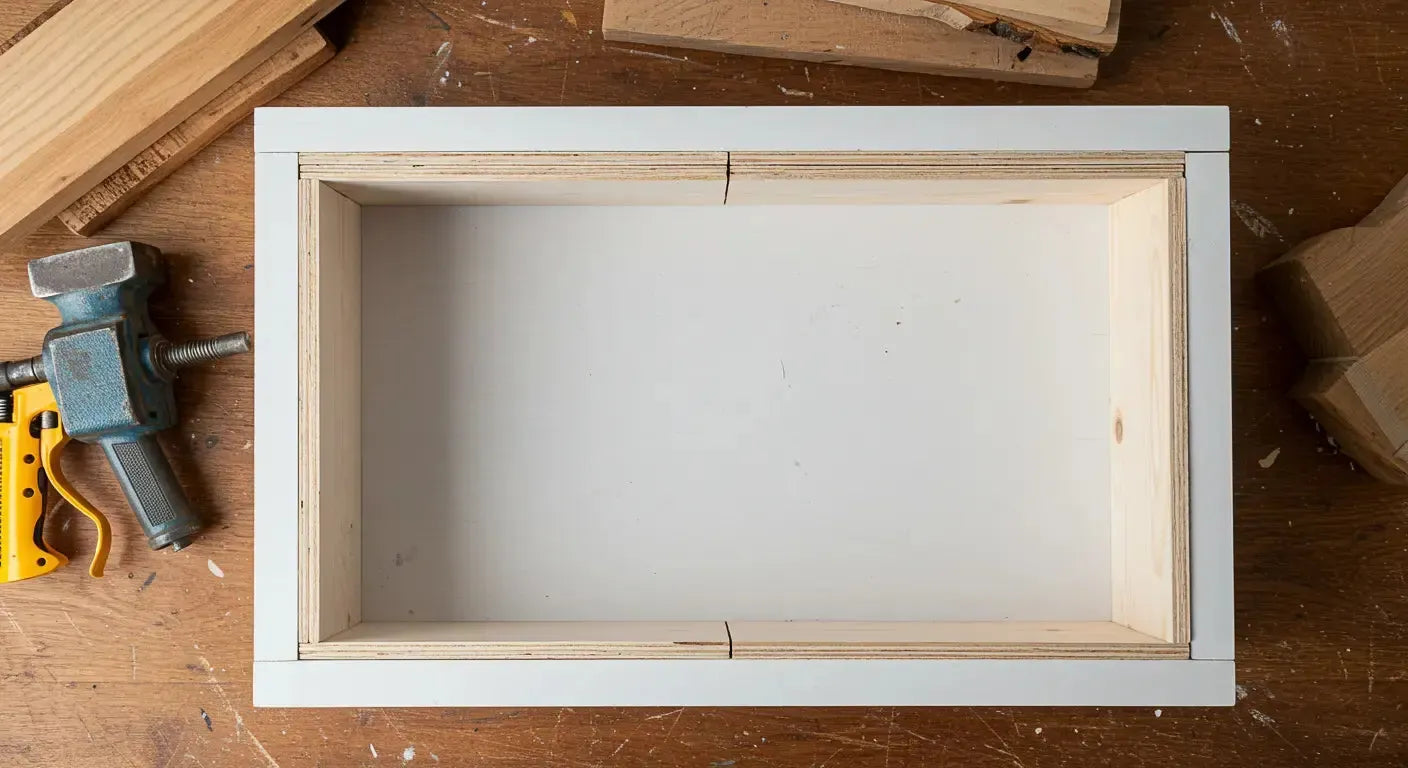
I used ¾” melamine board for the base and sides—smooth, flat, and resin doesn’t bond to it easily. Deck screws held the sides in place, and I sealed the edges with silicone caulk.
Mold release options that saved me during cleanup
I used Tyvek tape along the seams and a light coat of mold release spray. Skipping that = chiseling resin off melamine later. Not fun.
Design First: Planning Your Mold to Match Your Table Vision
Figuring out the exact table size and adding buffer space
I added ½" extra on each side to account for sanding and trimming later. You’ll want wiggle room.
Sketching dimensions so nothing goes sideways later
Simple pen and paper sketch saved me hours. Don’t eyeball this part.

Step-by-Step: How I Made My Resin Table Mold
Cut the baseboard and mold sides
Melamine cuts clean, but double-check your blade. A chipped edge on your mold can show up in your final pour.
Assemble the frame and double-check for gaps
I pre-drilled holes and screwed in the sides from underneath to avoid any resin leaks at the corners.
Seal all the seams (I learned this one the hard way)
Silicone caulk every seam. Don’t overthink it—just seal like your life depends on it.
Apply sheathing tape or mold release — don’t skip this
The tape gave me a slick surface inside the mold and made demolding 100x easier.
Leveling the Mold Before the Pour (Huge Step I Almost Missed)
How I made sure the epoxy didn’t pool on one side
I set the mold on my workbench and used shims to level it perfectly. Epoxy finds the low spot—don’t let that be a corner. I talk more about this step in my blog on how I build epoxy tables.
Quick trick for testing mold flatness before pouring
Pour a bit of water into the mold and watch where it goes. If it pools, adjust. It’s a lot cheaper to fix water issues than resin ones.

Pour Time: What I Did Before Touching the Resin
Securing the wood slab inside the mold
Clamps and hot glue under the slab helped keep it from floating when the resin went in.
Checking for leaks one last time (yes, it’s worth it)
I did a water test first. Caught a tiny drip I would’ve missed otherwise. Saved the project.
Mixing and pouring epoxy with confidence
With the mold solid and sealed, pouring was actually fun. Stress-free resin work = a better final piece.
Curing and Demolding: What Happens After the Pour
How long I waited before removing the mold
I gave it a full 72 hours to fully cure. Even though it felt hard after 24, I didn’t risk it. (If you’re wondering about curing or working time, our technical resin FAQ dives into those details.)
What tools helped with clean demolding
Plastic wedge scrapers and a soft mallet. Don’t pry with metal—melamine can chip or dent your resin edge.
The unexpected sanding stage I didn’t plan for
Once out of the mold, I had a small ridge along the pour edge. Nothing a router sled and polish couldn’t fix—but next time, I’ll plan for that cleanup step.

Resin Mold FAQs I Had (and Found Real Answers To)
What size should the mold be compared to the table?
At least ½" extra on each side. You’ll sand down and square the table later.
What’s the best material to build a mold from?
Melamine’s my go-to. It’s flat, cheap, and easy to work with. You can also try HDPE, but it costs more.
Can you reuse a resin mold or is it one-and-done?
You can reuse melamine molds a few times if they’re taped and cleaned well. But after 2–3 uses, they usually get too beat up. If you're new to this process, our beginner FAQ page has a few helpful tips too.
What I’d Do Differently Next Time
The one thing I wish I’d tested before the pour
I should’ve double-checked the level after clamping the slab in. The weight shifted it slightly—lesson learned.
Upgrades I’d make now that I’ve built a few molds
Threaded inserts for reusable sides. Adjustable walls. Handles on the baseboard for easier lifting. There’s always a better version to build.
How this build compares to silicone molds or form kits
Silicone’s great for small projects. Form kits are fast but expensive. Building your own epoxy table mold is still the best move if you want total control.

Helpful Resources I Used
Videos, calculators, and mold guides that saved me
- Stone Coat’s deep pour calculator
- YouTube videos from Blacktail Studio & Bourbon Moth
- Reddit’s r/ResinCasting for niche tips
Where I sourced my mold materials
Home Depot for melamine, tape, and caulk. TotalBoat for mold release and sealers. Easy to grab, easy to test. You can also just grab all these things from Amazon. I linked everything above.
Final Thoughts: Building a Mold Is Its Own Art
If you want to make your own DIY resin tabletop mold, don’t rush it. The mold makes or breaks the pour. Mine took longer than expected, but once I had it dialed in, it made the actual resin work 10x easier. And the best part? Now I can make tables in any size or shape I want.
Thanks for taking the time to read—I really appreciate it. I hope something in my process (or my mistakes) helps you along the way. If you want a custom piece or hit a wall building your own, feel free to drop a comment or reach out—happy to help. Have a blessed day!


Share:
1 comment
What material do you use to build the actual mold?