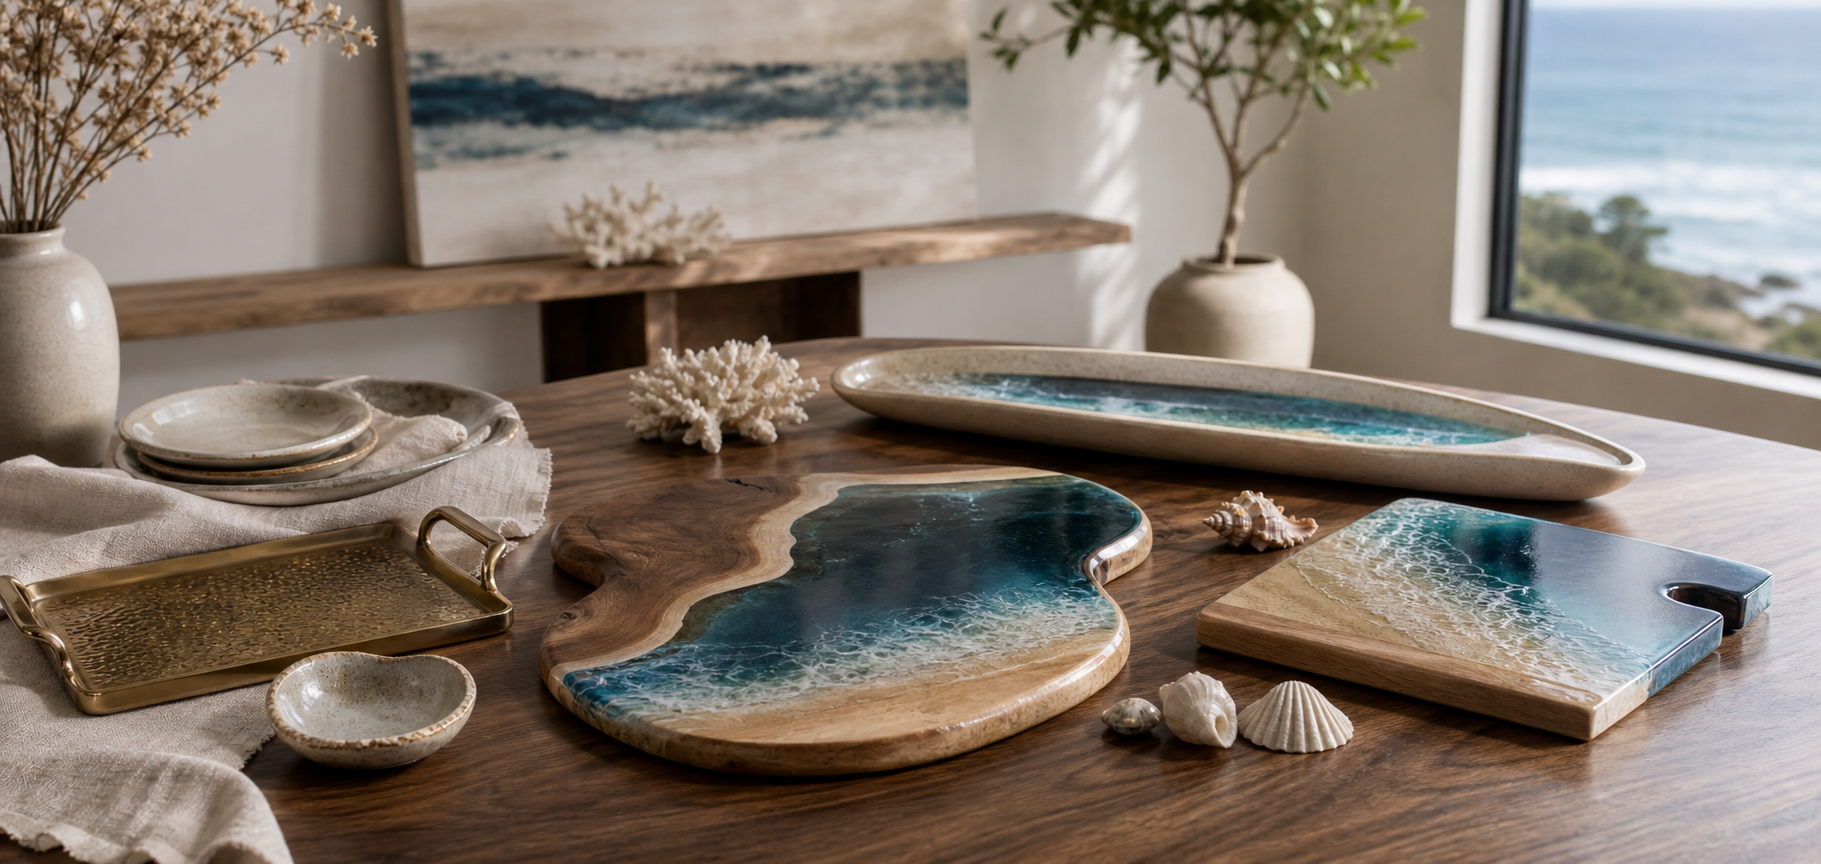
*If you're looking to shop these designs, check out our collection or request your own custom table here. Now let’s get into my river rock epoxy table experience.
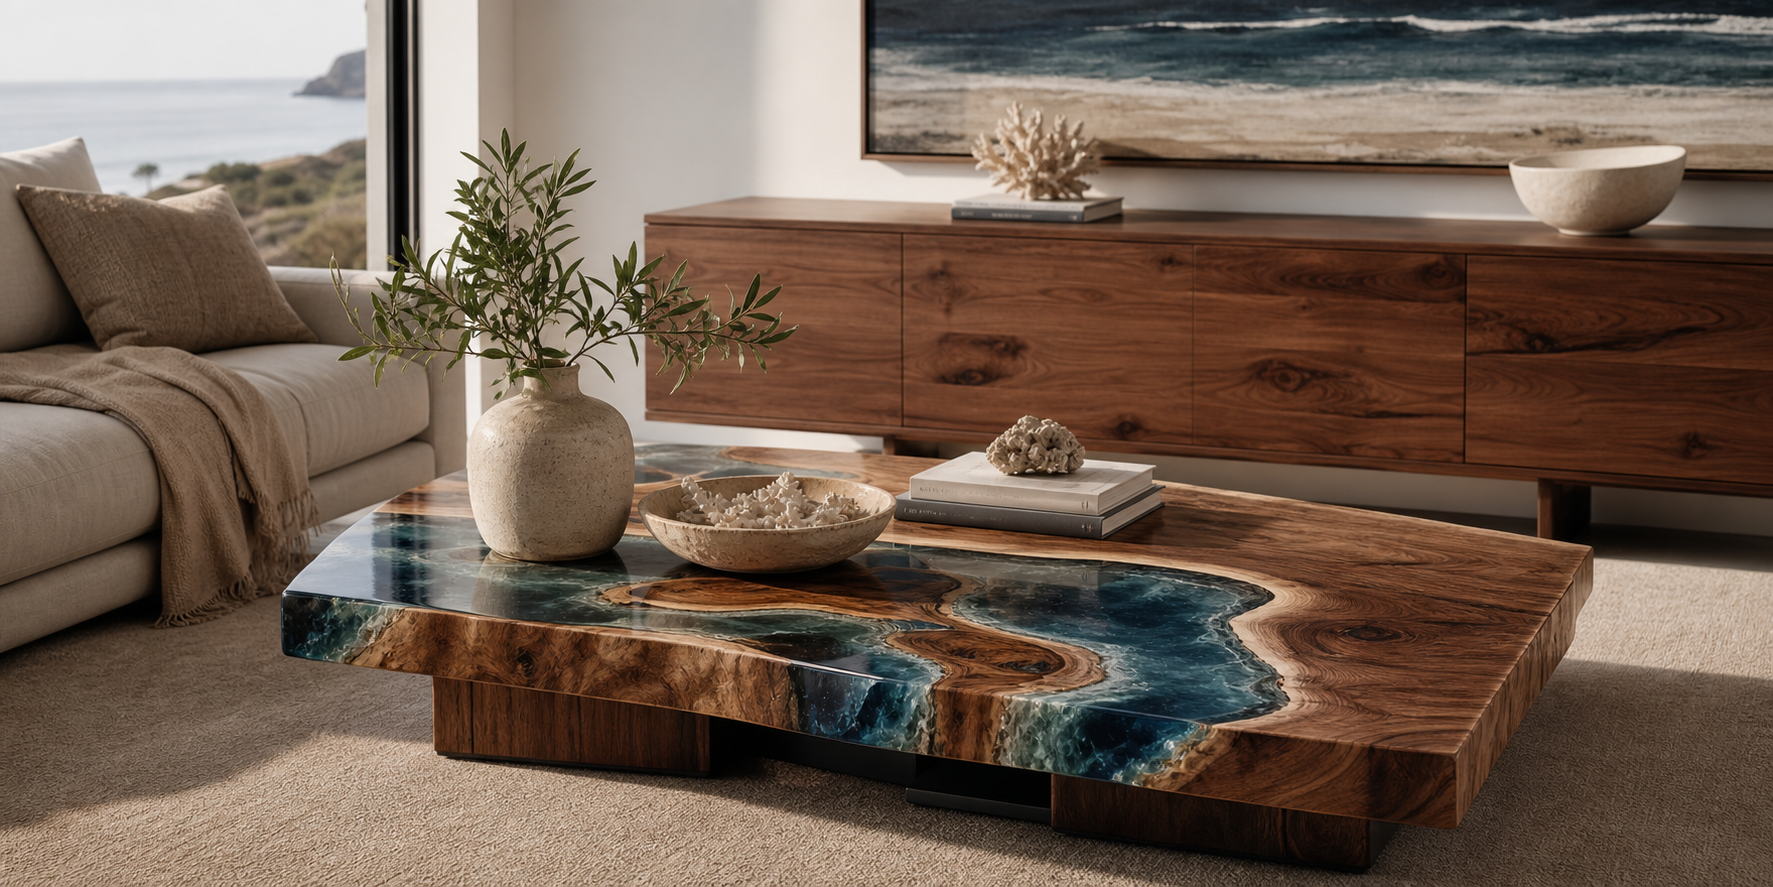
This build started with a bucket of river rocks and zero expectations. I didn’t plan on making a table that looked like a flowing stream—until I stumbled across some smooth stones on a hike and couldn’t stop thinking about how they’d look suspended in resin. The result? A river rock epoxy table that’s somehow both rugged and refined—and one of the most grounding pieces I’ve ever built.
Are epoxy river tables durable?
Yes — but it depends on the build. A properly made river rock epoxy table using UV-stable resin, sealed wood, and solid finishes can easily last 20+ years. I’ve personally moved mine across the country and used them daily without issues. But poor resin choice, bad pours, or skipping prep steps can lead to cracking, yellowing, or warping. I break durability down in detail here.
The Inspiration: Nature’s Beauty in Furniture
Discovering the allure of river rocks and envisioning them as the centerpiece of a unique table design.
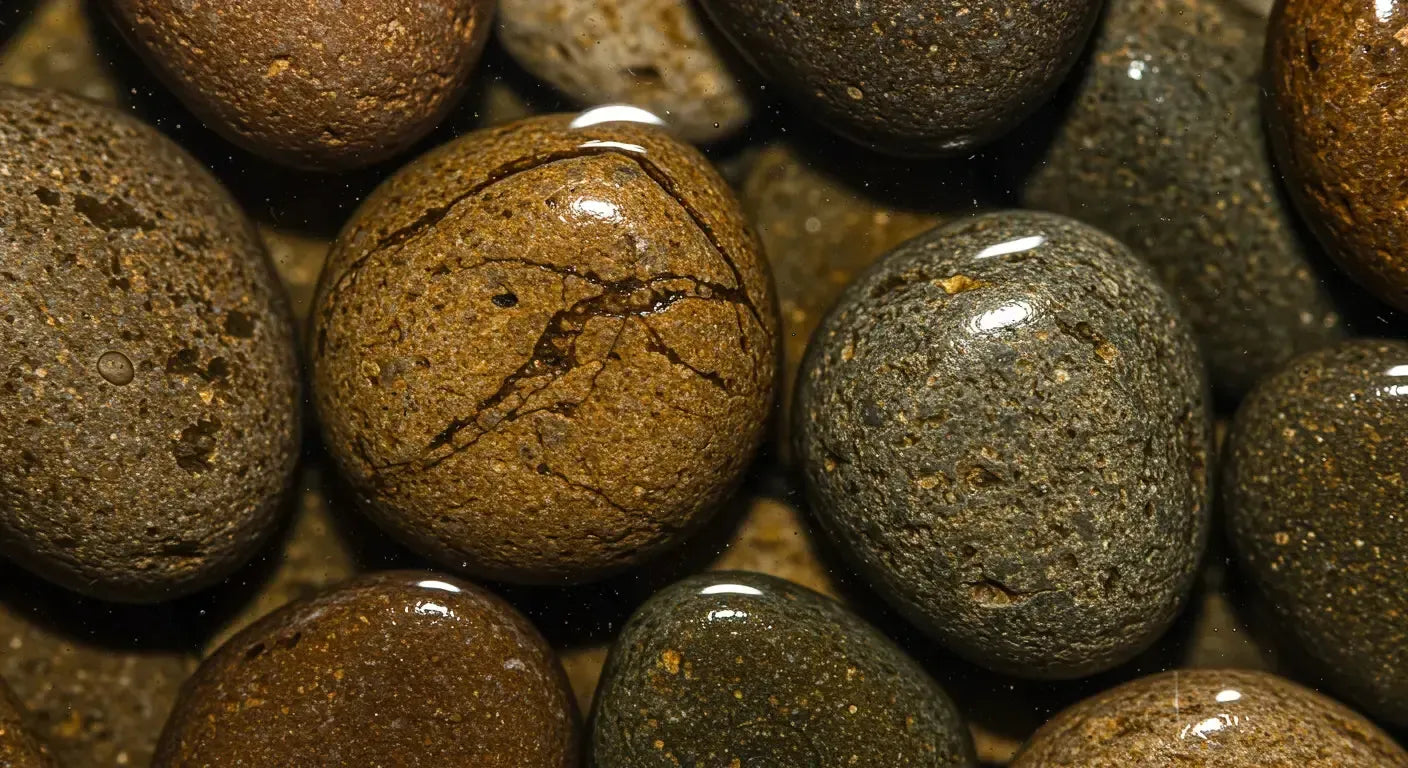
River rocks have this organic magic to them. Each one feels like it’s been shaped with intention—even though nature did all the work. The more I looked at them, the more I saw potential: texture, tone, and that smooth polish that plays so well with resin. I didn’t want a typical river table—I wanted a stone epoxy table that felt like you’d scooped a piece of creek bed and sealed it in time.

Where do I get the rocks for the river table?
You can collect rocks yourself like I did (just make sure they’re fully dry and dense), or buy them online. I used these smooth river rocks for future projects because they’re pre-cleaned and easy to work with. Avoid porous or super irregular stones—they can trap air bubbles and moisture under resin.
Gathering Materials: Selecting the Right Rocks and Wood
Tips on choosing suitable river rocks and complementary wood slabs for the project.
Not all rocks work in resin. I learned that fast. Some are too porous, others hold moisture that can cause bubbles or cloudiness. I stuck with smaller, dense stones with a natural matte finish. For the wood, I went with live edge maple—a light tone that wouldn’t compete with the darker rocks. The contrast helped the “river” stand out without looking too busy.
Preparing the Wood: Cleaning and Sealing
Steps to clean, sand, and seal the wood to ensure a smooth epoxy application.
Before I even thought about pouring, I cleaned and sanded every surface. Then I sealed the slabs with a thin coat of epoxy to prevent bubbles from escaping during the main pour. Sealing the wood was crucial—it kept the riverbed clean and let the epoxy flow without hiccups. I talk more about this in my post on resin bonding to wood.

Designing the Layout: Placing the River Rocks
Arranging the rocks to create a natural-looking river flow within the table.
This part took longer than I expected. I laid out the rocks one by one, trying to mimic the randomness of nature—but in a way that still felt intentional. A few accent stones went toward the shoreline edges, with smaller pebbles in the middle to give it that natural gradient. The layout made all the difference. It turned the slab into a canvas.
How much does it cost to epoxy a table?
Materials alone can cost anywhere from $500 for small DIY projects to several thousand dollars for large deep-pour tables. My full custom builds typically land between $3,000 and $9,000 depending on wood, resin depth, size, and complexity. I break down costs in detail here.
Building the Mold: Crafting a Leak-Proof Frame
Constructing a sturdy mold to contain the epoxy and prevent leaks during the pour.
I built the mold using melamine and sheathing tape, clamped everything tight, and triple-checked for leaks. You can read more about my mold setup in this blog.
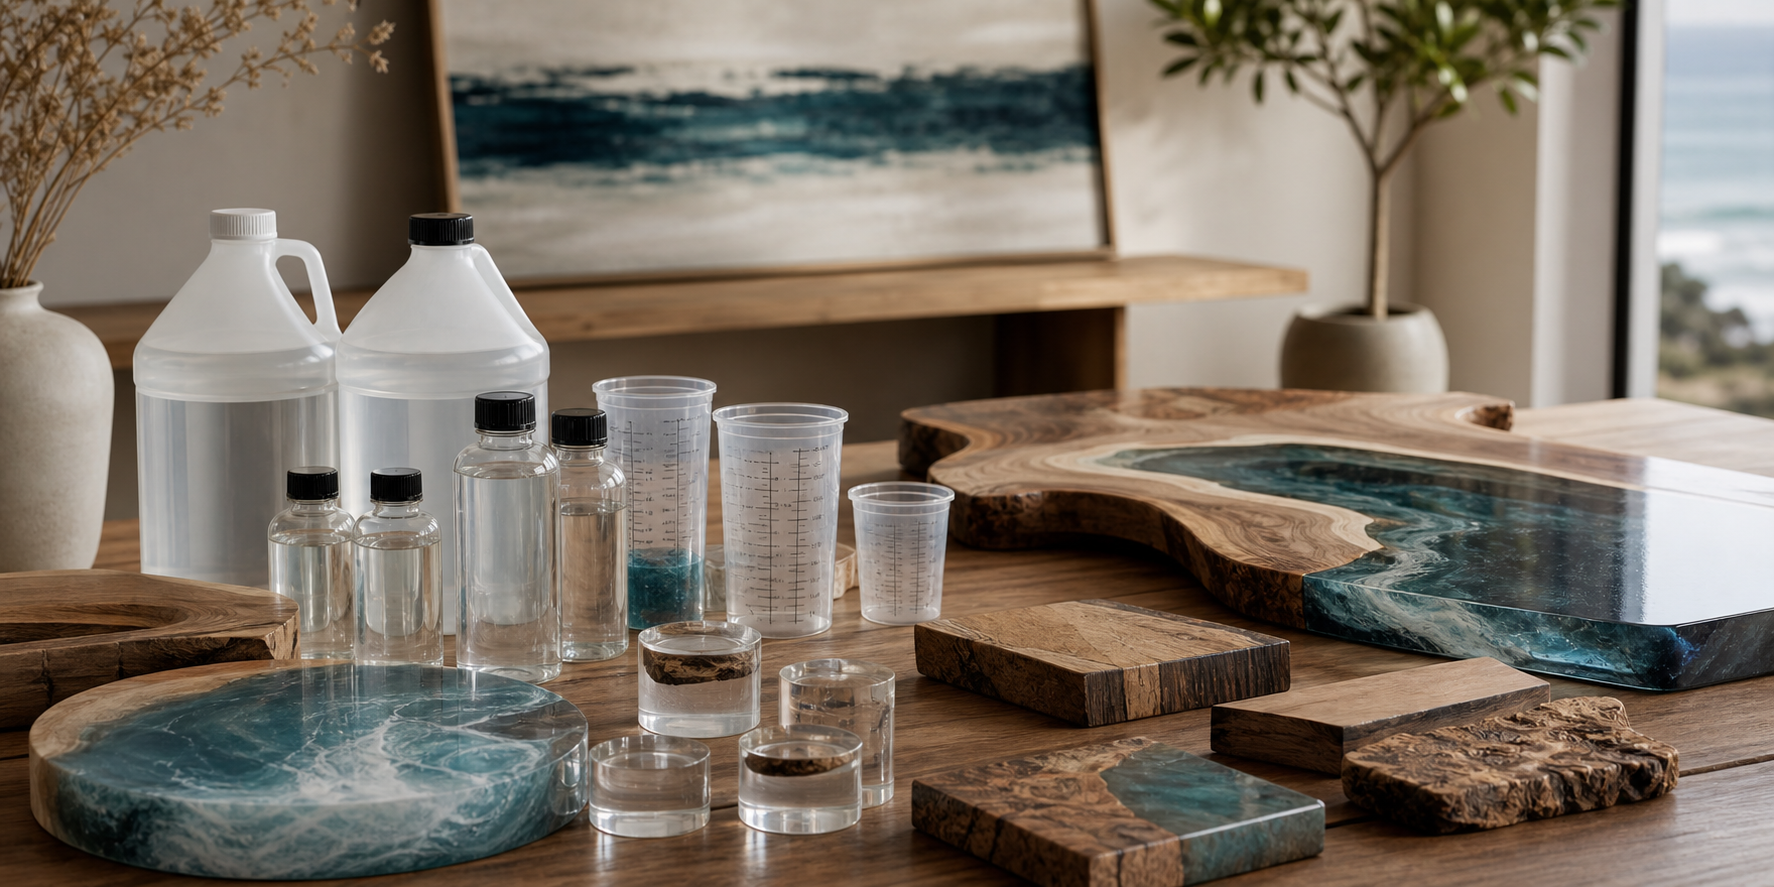
Mixing and Pouring Epoxy: Bringing the River to Life
Mixing the epoxy resin and carefully pouring it over the arranged rocks to create the river effect.
I used a clear, deep-pour resin and mixed in small batches to keep control over timing and bubbles. Pouring over rocks was trickier than I thought—epoxy tends to trap air underneath uneven surfaces. I poured slow and used a heat gun between layers to pull bubbles up. I go into more resin selection details in this resin breakdown.
How much will 1 gallon of table top epoxy cover?
Rough rule of thumb: 1 gallon of tabletop epoxy covers about 12-16 square feet at 1/8 inch thick. Deep pours use far more resin. For my river rock table (at 2" deep), I used nearly 8 gallons total. Deeper pours require careful batch mixing and slow layering to avoid overheating. More on pour depths here.
How many gallons of epoxy do I need for a river table?
It depends on size and depth. A small coffee table might need 3-5 gallons. A full dining table with deep-pour resin may take 8-15 gallons. Always calculate based on your mold volume and leave extra for testing and topping off.
Curing and Finishing: Achieving a Glossy Surface
Allowing the epoxy to cure properly and sanding the surface to achieve a glossy finish.
Once cured, I sanded the top starting at 120 grit and worked my way up to 600 grit. Then I hit it with a polishing compound. The mirror-like finish made the river rock epoxy table look like a snapshot of a flowing creek—frozen under glass.
Final Touches: Adding Legs and Protective Coating
Attaching legs to the table and applying a protective coating to enhance durability.
I went with matte black steel legs—simple, modern, and clean. I gave the surface a final coat of oil for extra UV protection and called it done. This piece now sits alongside some of my other epoxy coffee tables and dining builds, and it holds a story that started by the water’s edge.
Reflections: Lessons Learned and Tips for Future Projects
Sharing insights gained during the project and advice for others interested in creating their own river rock epoxy table.
- Choose rocks wisely: smooth and dry is key.
- Test your layout before sealing the mold.
- Pour slow, layer if needed, and watch the corners.
- Don’t over-polish—let the resin do the talking.
- Keep it simple. The rocks already bring the drama.
Thanks for taking the time to read—I really appreciate it. I hope something in my process (or my mistakes) helps you along the way. If you want a custom piece or hit a wall building your own, feel free to drop a comment or reach out—happy to help. Have a blessed day!


Share:
1 comment
I was doing a river rock table about 2 days after deep pour and my neighbor accidentally stuck his finger in the resin
I can’t get it to look clear and smooth any suggestions? Thanks