This one started with a bucket full of seashells and zero plan. I had no idea what I was going to do with them—just knew I didn’t want them sitting in a jar collecting dust. Then it hit me: what if I turned those shells into something permanent? Something useful. Something that brought that beach mood indoors. That’s how this seashell epoxy table idea came to life.
The Inspiration: Turning Beachcombing Finds into Functional Art
Collecting seashells during coastal walks sparked the idea of embedding them into a table, preserving memories in a unique piece of furniture.
I’d been taking coastal walks for years, and my shell collection just kept growing. They weren’t perfect—they were weathered, textured, and full of character. That’s what made them special. One day, while working on a river table, I realized these shells could be more than just keepsakes. They could be the design. The idea of a beach themed resin table instantly felt right—like I could bottle up that ocean feeling and bring it into my shop.

Selecting the Right Materials: Wood, Resin, and Seashells
Choosing a suitable wood slab and high-quality epoxy resin to complement and preserve the natural beauty of the seashells.
For the wood, I chose a light-toned maple slab with soft grain—neutral enough to let the shells stand out, but still warm and rich. For the resin, I used a crystal-clear deep-pour epoxy to make sure every shell stayed visible and crisp. The clarity matters with a seashell table—you want that depth and transparency to feel like glass over sand. If you're unsure which resin to use, here’s what I learned about choosing the right epoxy.
Preparing the Seashells: Cleaning and Arranging
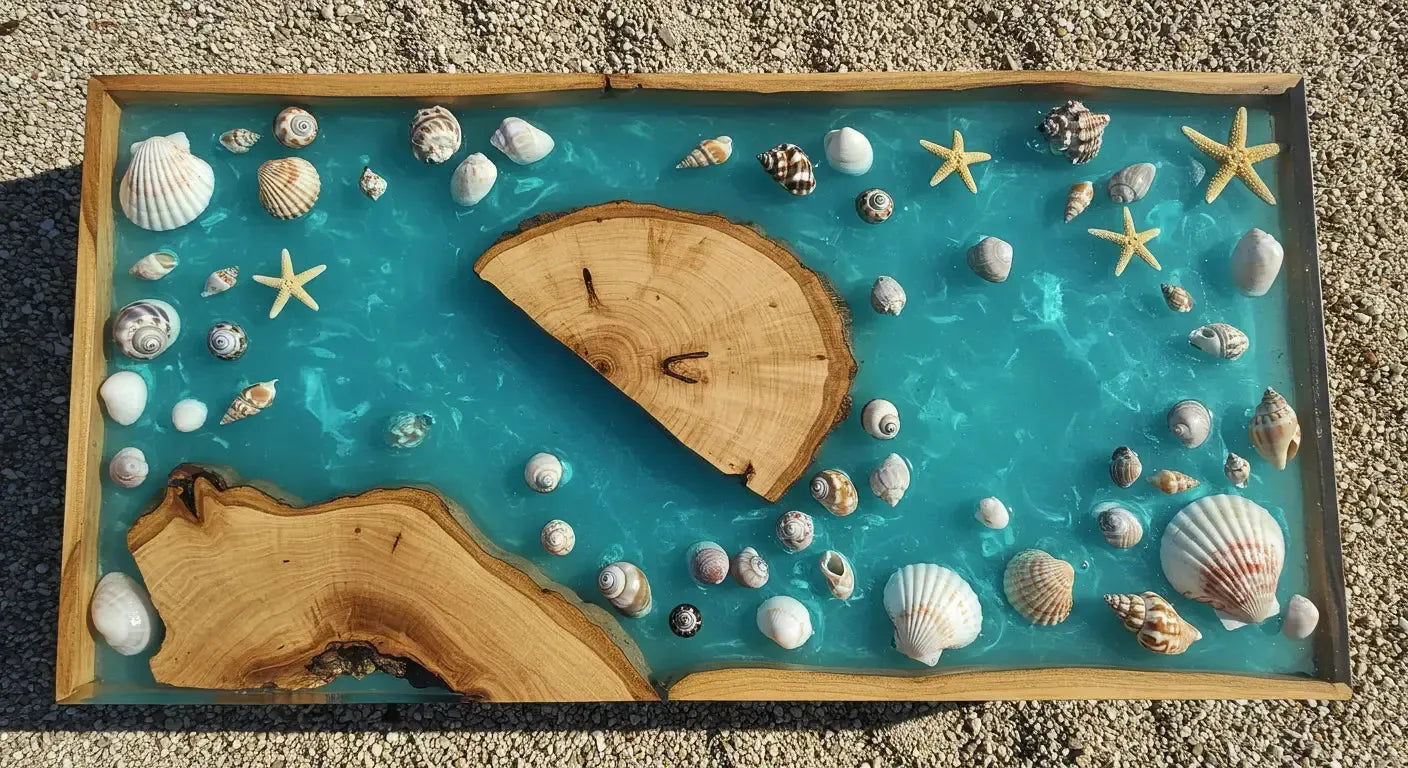
Cleaning the collected seashells and thoughtfully arranging them to create an aesthetically pleasing design within the table.
Each shell got cleaned with a soft brush and mild soap. I skipped bleach—didn’t want to lose their natural tone. Then came the layout, which was basically an hours-long puzzle. I played with spacing, tried to mimic the feel of a shoreline, even sprinkled in a few pieces of sea glass for texture. The result? A layout that didn’t look staged. Just soft curves and clusters like waves left them there.

Building the Mold: Creating a Secure Frame for the Resin Pour
Constructing a sturdy mold to contain the resin and ensure a smooth, leak-free pour.
The mold was basic melamine sealed with Tyvek tape. The key here was sealing every edge tight—resin leaks ruin more ocean pours than you’d think. I clamped everything down, tested with water, then dried it out before pouring. For more build tips, check out how I made my mold setups work.
The Pour Process: Encasing the Seashells in Resin
Mixing and pouring the epoxy resin carefully to encapsulate the seashells, creating a clear, durable surface.
This is where things got fun (and slightly nerve-wracking). I did it in layers to avoid heat build-up and give each layer time to settle. First layer was clear, just to set the shells. Then I added a tiny amount of soft blue tint in the next pour for an underwater vibe. A quick sweep with the torch helped pop bubbles, and I let it cure for 48 hours. When the light hit it the next morning, the shells looked suspended in water. Like a tide pool frozen in time. If you love coastal builds, you’ll probably enjoy the turquoise epoxy table I made, too.

Finishing Touches: Sanding, Polishing, and Sealing
Sanding and polishing the cured resin to achieve a glossy finish, followed by sealing the wood to protect and enhance its appearance.
After the pour fully cured, I sanded through the grits—starting at 120 and working up to 600. Then a buffing pad and polishing compound brought out that wet-look gloss. I finished the wood with Rubio Monocoat to keep the natural tone and give it some protection. The contrast between the warm wood and the cool, clear ocean epoxy table top? Unreal. If you're curious about other finishes I’ve tested, here’s what actually worked for me.
Reflections: Lessons Learned and Future Projects
Sharing insights gained during the project and ideas for incorporating natural elements into future woodworking endeavors.
Here’s what I’d tell anyone thinking of making a seashell epoxy table design:
- Test your shell layout before pouring
- Use multiple thin pours instead of one deep one
- Don’t overthink symmetry—let the ocean do the talking
- A soft blue tint goes a long way
- Keep everything clean. Resin magnifies every detail
I’m already planning the next one—maybe with driftwood or coral. But this one? It’ll always remind me of those coastal mornings and the idea that even the simplest things—like a seashell—can become art.

If you have any questions about anything or are looking for a commissioned piece, just leave a comment or send me a message! Have a blessed day.


Share: