If you're just looking to shop these tables rather than learn about the process of making them you can always check out custom table request page here. Now lets get into it.
I’d made plenty of rectangles. Clean edges, simple forms. But something about them was starting to feel… expected. I needed a shake-up. That’s when the idea of building an oval epoxy table started nagging at me. Spoiler: It was way harder than I thought. But also way more rewarding.
Why I Wanted to Try an Oval Shape in the First Place
I’d seen too many rectangles — I needed something different
You know how resin river tables tend to look the same after a while? I wanted something softer. More sculptural.
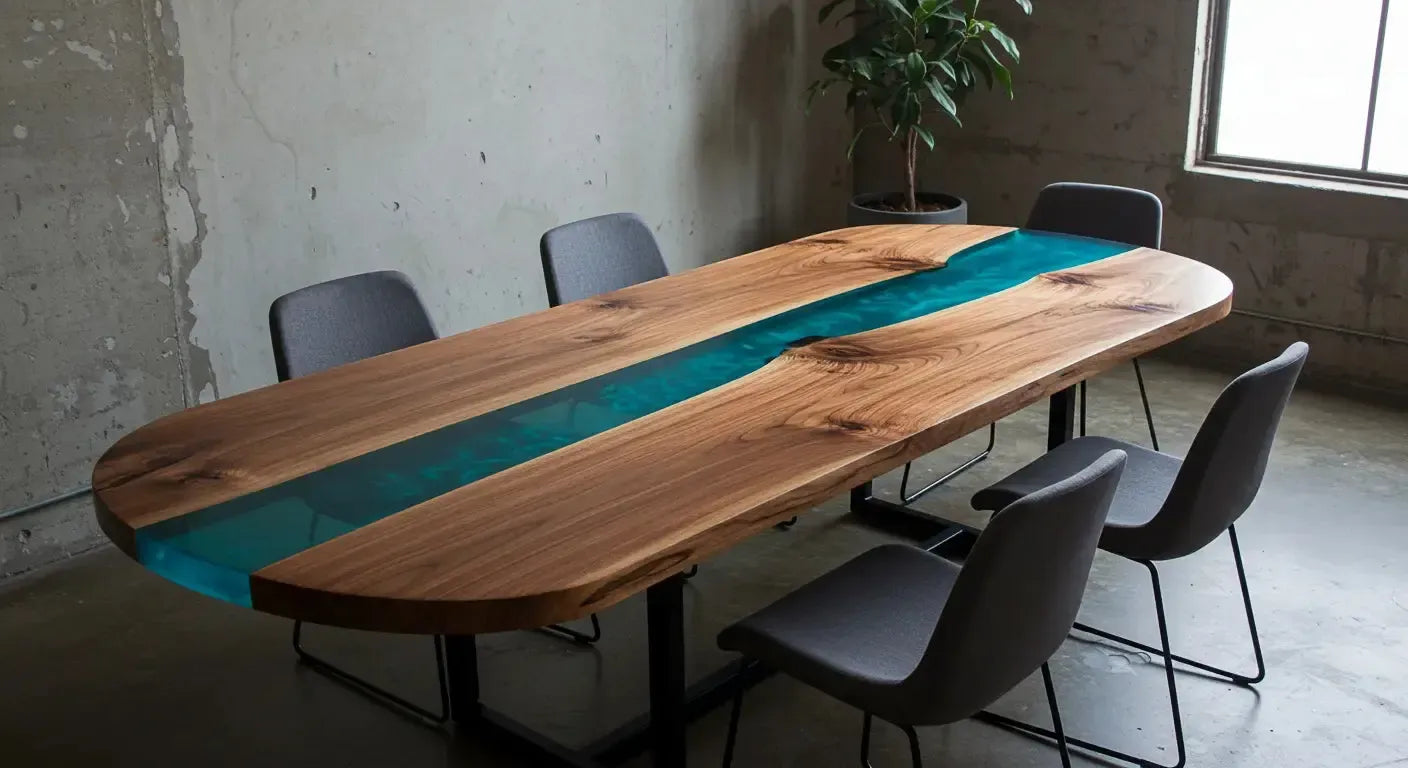
The curves gave it this soft, high-end feel I couldn’t shake
The oval just looked… intentional. Like it belonged in a design studio, not just a workshop. And that got me hyped.

Planning It Out (And Second-Guessing Everything)
Finding wood that would work with the oval layout
I needed slabs with enough width and movement to still look natural once cut into curves. I ended up using bookmatched walnut and trimming them to follow the flow of the oval shape.
The mold had me stressing — curves are no joke
You can’t just tape some boards together and call it a day. I had to bend MDF, clamp it in sections, and reinforce it so it didn’t flex mid-pour.
Sketching it 5 different ways before I finally pulled the trigger
Seriously—I changed the resin color three times on paper. Settled on smoky blue with light swirl. It let the walnut breathe but still gave the piece personality.
What I Used (And What I Wish I Had)
Tools that actually made a difference
- Router sled (for flattening post-pour)
- Heat gun and torch (tight curves = trapped bubbles)
- Flexible mold wall material (I used bendy Melamine and braced it every 6 inches)
Epoxy type + pigment choices that worked with the shape
Deep pour resin with a long open time was essential. For pigment, I kept it subtle—pearlescent blue powder with a transparent base.
Mistakes I made with supplies that almost cost me the pour
I underestimated how much epoxy I needed (again). Always calculate for volume + 10% buffer. Especially with a shape like an oval epoxy river table—you’re going to use more than you expect.

Getting the Mold Right Was... a Whole Thing
How I got the curve to bend (and stay)
I soaked thin Melamine strips in warm water, clamped them into an oval frame overnight, then reinforced with angled braces. The curve held beautifully.
Where the leaks started — and how I sealed them mid-pour
Yeah… I missed a seam. Resin started creeping out under the form. I used hot glue and fast-setting caulk—panicked, but it held.
One trick I used to make sure the oval stayed symmetrical
I traced the outline onto my base board first using a large DIY compass. That gave me a perfect centerline and balance for both slabs.
The Pour: Here’s What I Got Right (and What I Didn't)
The epoxy looked amazing — until it hit the edges
The outer curves pulled the resin faster than expected. I had to torch in passes to keep it even.
How I layered the colors to keep the shape clean
I poured a clear base layer first to lock the slabs down. Then layered tinted resin slowly to avoid swirling too far into the grain.
Dealing with bubbles and heat in tight curves
More heat means more reaction—especially in small corners. I had to babysit this pour for two hours. Worth it.

After the Pour: What I Did to Finish It Off
Sanding that edge took forever — but it was worth it
There’s no easy way to sand an oval. I had to go slow, rotate often, and use a flexible sanding block to match the curves.
Polishing gave it that glassy look I was chasing
Wet sanded to 1200 grit, then hit it with a buffing compound. That deep blue resin lit up once it was polished.
Mounting the legs without ruining the flow of the piece
I used slim steel legs positioned just inside the ends of the oval so the silhouette stayed uninterrupted. Minimal and balanced.
What I Learned From Building an Oval Epoxy Table
Curves are harder — but way more satisfying
They force you to think about design, balance, and grain movement in a whole new way.
If I ever make another one, I’d tweak these few things
- Add a thicker baseboard to support the mold
- Use better clamps for the curved form
- Pre-curve the slabs before mounting them
Honestly? It might be my favorite table so far
There’s just something about it. It’s soft. Sculptural. Not something you see every day.

FAQs I Had Before I Tried This (You Might Too)
Does epoxy even work with an oval mold?
Yes—but you need flexible mold walls and strong reinforcement. Regular box molds won’t cut it.
How do you keep the edge from looking wavy?
Make sure your mold is braced tightly and your epoxy is mixed slowly. If the resin’s too hot, it will pull and sag on the curves.
Can you make the mold without fancy tools?
Definitely. I built mine with basic Melamine, clamps, screws, and some patience. Just don’t skip the measuring and reinforcement steps.
Final Thoughts
Building an oval shaped resin table pushed me outside my usual comfort zone—and I’m so glad it did. It feels less like a project and more like a sculpture you can live with. If you’ve been thinking about skipping the standard rectangle and going for curves, do it. You’ll learn more, sweat more, and end up with something unforgettable.
If you want a custom piece or hit a wall building your own, feel free to drop a comment or reach out—happy to help. Have a blessed day!


Share: