I never thought something as small as a resin table name plate could be this satisfying to make. It started as a side idea—just something simple to personalize a custom build. But once I made one, it became one of my favorite parts of the entire table. It’s a way to sign your work, tell a story, or just make a table feel like it was meant for someone. Here’s how I made mine—and how you can create your own custom resin nameplate that actually stands out.
Why I Decided to Make a Resin Name Plate
The inspiration behind the project
I had just finished a big custom walnut build, and I didn’t want to slap a generic sticker or logo on it. I wanted something that felt permanent—like part of the table’s DNA. That’s when the idea for an epoxy name plate for table builds clicked.
Challenges I faced finding the perfect design
Most nameplates felt cold. Too industrial. Too standard. I wanted something with color, depth, and personality—so I decided to make it out of resin.

Materials and Tools I Used
Essential supplies for resin crafting
- Epoxy resin (I used a small-batch tabletop formula)
- Silicone mold (either pre-made or custom cut)
- Pigments or mica powder
- Vinyl lettering or laser-etched acrylic (for the name)
- Stir sticks, mixing cups, gloves
Optional embellishments to enhance the design
- Gold leaf
- Faux flowers
- Glow-in-the-dark pigments
- Crushed stone or metal flakes If you want to make your custom resin name plate a full-on showpiece, little accents go a long way.
Designing the Name Plate
Choosing the right mold or creating a custom one
You can buy name plate molds, but I made a quick custom one using scrap acrylic and hot glue. That let me size it to match the table’s dimensions perfectly.
Selecting fonts and layout for the name
I used a vinyl cutter to create a clean, modern font—then stuck it on the cured resin before sealing it with a final clear coat.
Incorporating colors, glitters, and other effects
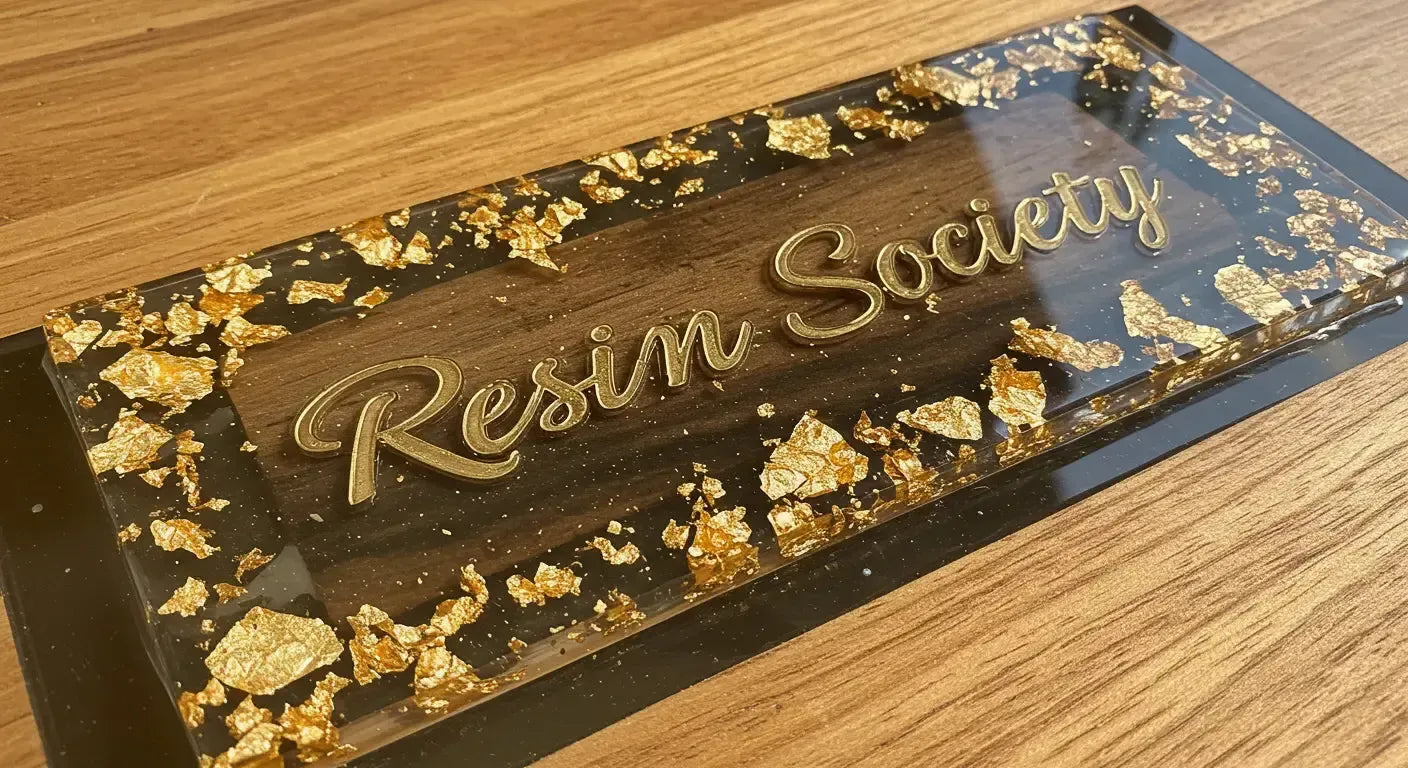
My first plate was simple: black resin with gold leaf and white lettering. It looked bold, clean, and custom without being flashy.

Step-by-Step Guide to Crafting the Resin Name Plate
Preparing the workspace and materials
I set up in a dust-free area, leveled my mold, and prepped everything before mixing—resin waits for no one.
Mixing and pouring the resin
I mixed for 3–5 minutes, poured in one layer, and used a torch to pop bubbles right away.
Adding the name and decorative elements
Once the resin gelled slightly, I placed the name vinyl and gold flakes. You can also embed acrylic letters or etch into cured resin.
Curing and demolding the finished piece
I let it cure for 24–48 hours, depending on the resin. The moment I popped it out of the mold? Straight-up magic.
Tips and Tricks I Learned Along the Way
Avoiding common mistakes
- Don’t pour too deep in one shot—thin layers are safer
- Use a level mold—seriously
- Always use mold release or sheathing tape if you want clean edges
Ensuring a bubble-free finish
Warm the resin bottles before mixing and use a heat gun in quick passes.
Achieving a professional look
A light sanding and polish after curing makes a huge difference. I also sometimes finish with a UV-stable clear coat to keep the gloss.

Displaying and Caring for Your Resin Name Plate
Mounting options for tables and desks
I’ve embedded some right into the epoxy surface. Others I attach using strong adhesive or recessed hardware into the wood.
Cleaning and maintenance tips
Wipe with a soft microfiber cloth. No abrasives. Keep it out of direct sun if possible—just like the rest of your resin pieces.
Frequently Asked Questions
Can I use different types of resin?
Yes, but make sure it’s made for thin pours. Tabletop epoxy is ideal for name plates—casting resin works too, but takes longer to cure.
How do I fix imperfections?
Small air bubbles or surface dents? Sand and flood coat. Vinyl not sticking right? Use transfer tape and apply while the resin is still tacky.
Is it safe to use resin indoors?
Absolutely—as long as the space is well ventilated and you use proper PPE. Once it’s cured, it’s non-toxic and safe for indoor use.

Final Thoughts and Encouragement
Reflecting on the creative process
What started as a practical solution turned into one of the most personal, satisfying parts of my workflow. A **resin name plate** isn’t just branding—it’s storytelling.
Encouraging others to try resin crafting
If you’ve got a table or desk that needs a personal touch, a custom epoxy name plate for table projects is one of the easiest ways to add impact. Small detail. Big presence. And hey—if you end up making one, send it my way. I love seeing what other makers come up with. If you have any trouble with making your own just reach out!


Share: